Collecting Metrics
Objectives:
Add tags in the Agent config file and show us a screenshot of your host and its tags on the Host Map page in Datadog.
Install a database on your machine (MongoDB, MySQL, or PostgreSQL) and then install the respective Datadog integration for that database.
Create a custom agent check.
Add tags in the agent config file
Add tags in the Agent config file and show us a screenshot of your host and its tags on the Host Map page in Datadog.
On OS X the config file for the datadog-agent is at ~/.datadog-agent/datadog.yaml
For now, the contents of the file can be limited to:
hostname: gearbox09.dev.controlplane.info
tags:
  - environment: dev
  - admin_email: jitkelme@gmail.com
  - os: ubuntu-bionic
  - host: gearbox09
env: dev
log_level: 'info'
Restart the agent after updating this file and you will begin to see data in your Host Map:
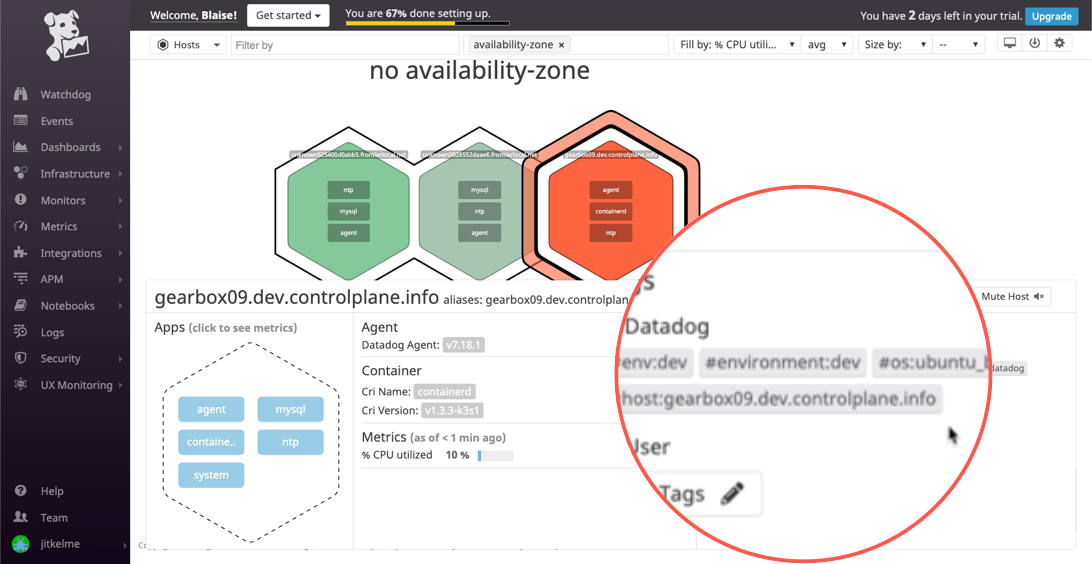
Web UI Host Map with agent-provided tags.
Add an integration for MySQL
Install a database on your machine (MongoDB, MySQL, or PostgreSQL) and then install the respective Datadog integration for that database.
Use the instructions at the Documentation site (https://docs.datadoghq.com/integrations/mysql/) because they are closer to what you will find on your desktop machine.
Configure the DataDog agent
Provide the agent with the details it needs to receive data from MariaDB. Edit the ~/.datadog-agent/etc/conf.d/mysql.d/conf.yaml.
In my case, it looks like this:

Web UI with MySQL metrics
Create a custom Agent check
Create a custom agent check configured to submit a metric named ``my_metric`` with a random value between 0 and 1000.
Since I’m deploying on a remote host, I commit my files to git, and push the feature branch so that I can pull them onto the remote host.
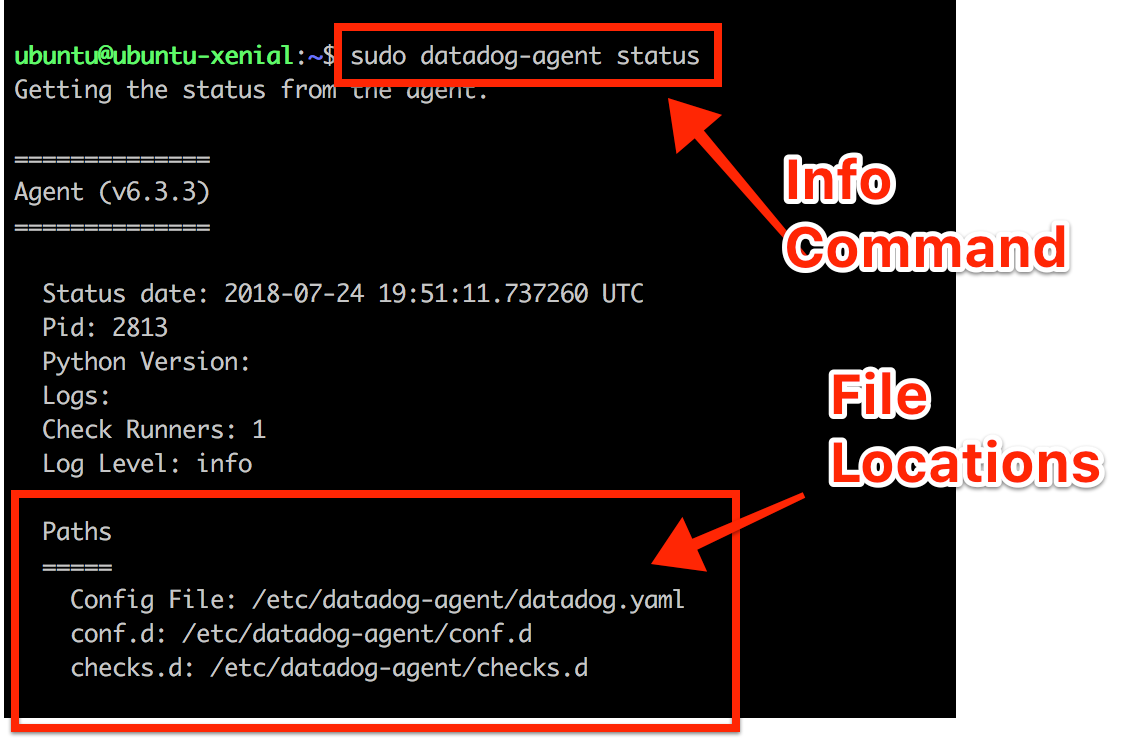
The directory structure is important, so I copy the files from my repo directory to the agent’s conf.d and
checks.d locations.
$ sudo -u dd-agent cp zero2datadog/checks.d/custom_hello.py /etc/datadog-agent/checks.d/custom_hello.py
$ sudo -u dd-agent cp zero2datadog/conf.d/custom_hello.yaml /etc/datadog-agent/conf.d/custom_hello.yaml
If you have an IDE like PyCharm or VS Code, you can synchronize the file transfer.
This image courtesy of Brendan Roche illustrates the paths for the check files and for the configuration files in Agents v6 and above.
Change the check’s collection interval
Change your check’s collection interval so that it only submits the metric once every 45 seconds.
The collection interval for this check can be controlled using the conf.d/metrics_example.yaml file.
Bonus:
Can you change the collection interval without modifying the Python check file you created?
Yes, the interval can be set by changing the instance description in the yaml file, like this:
init_config:

instances:
        - min_collection_interval: 45